Last modified 2026-02-19 |
Save Input Files or File Sets to a Study (Tutorial)
 | Abbreviations Key |
| HISE | Human Immune System Explorer |
| IDE | integrated development environment |
At a Glance
This tutorial shows you how to save an input file or file set from your search results directly to a study in the HISE Collaboration Space. This process lets you associate selected files with relevant studies. If you have questions, contact Support.
When to Use This Process
Use this process to associate your Advanced Search results with a specific study in the HISE Collaboration Space. Saving files to a study can accomplish any of the following objectives:
- Use Advanced Search results to create or add to file sets attached to a study for collaborative analysis or reporting.
- Capture the exact provenance of input files used to define a cohort or data set so that downstream analyses are reproducible and traceable.
- Gather related input files into one study before attaching an IDE instance, building a visualization, or creating additional study artifacts.
- Promote ad hoc search results into study‑scoped assets as you move from exploratory work to structured research.
- Create or add to file sets for AI/ML training runs.
Instructions
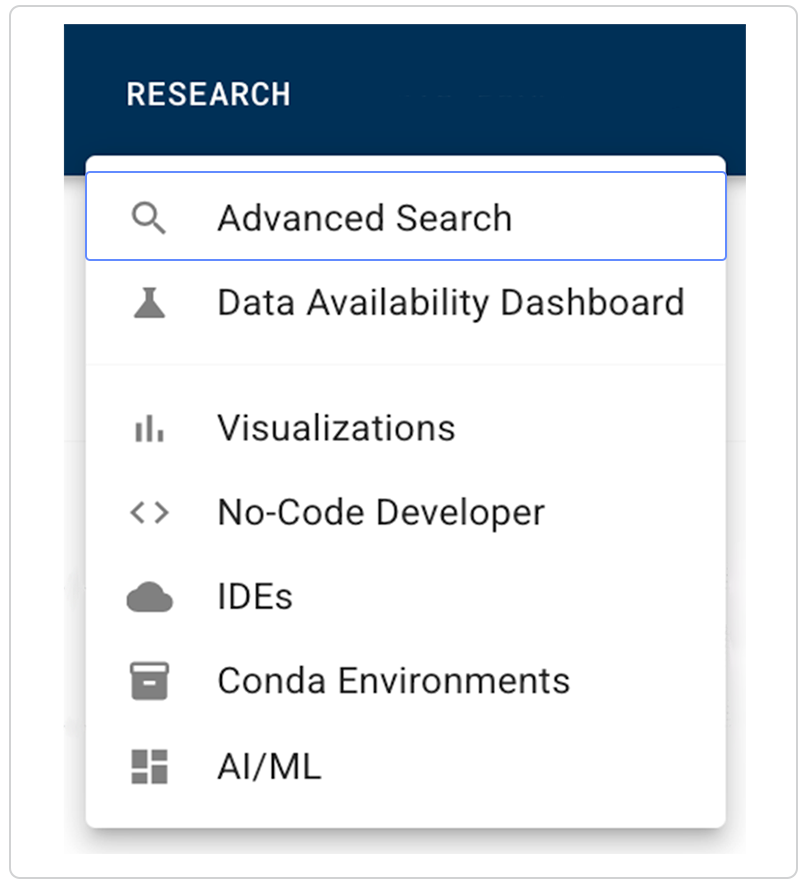
1. In HISE, click RESEARCH > Advanced Search.
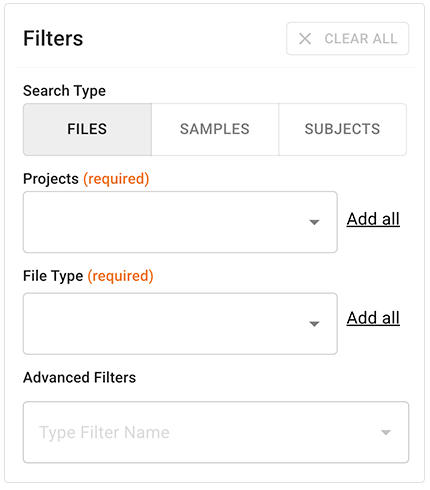
2. Use the Filters sidebar to create a search. For details, see Use Advanced Search for Basic Queries (Tutorial).
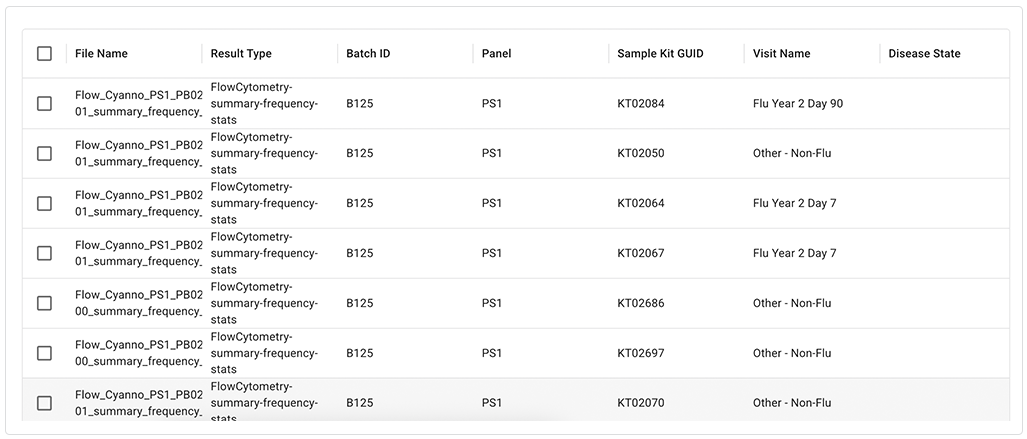
3. In the results window, use the checkboxes to select the files you want to retrieve.
4. In the floating options menu, choose an option. click CREATE FILE SET or ADD TO FILE SET.
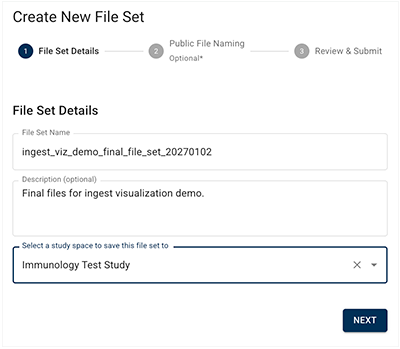
A. Click CREATE FILE SET

i. On the Create New File Set page,in the File Set Details dialog box, enter the requested information and click NEXT.
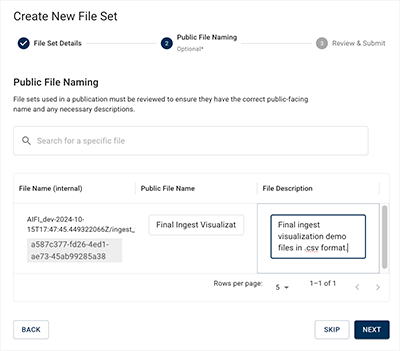
ii. On the Create New File Set page,in the Public File Naming dialog box, enter the requested information.
iii. On the Create New File Set page,in the Review and Submit dialog box, review the information.
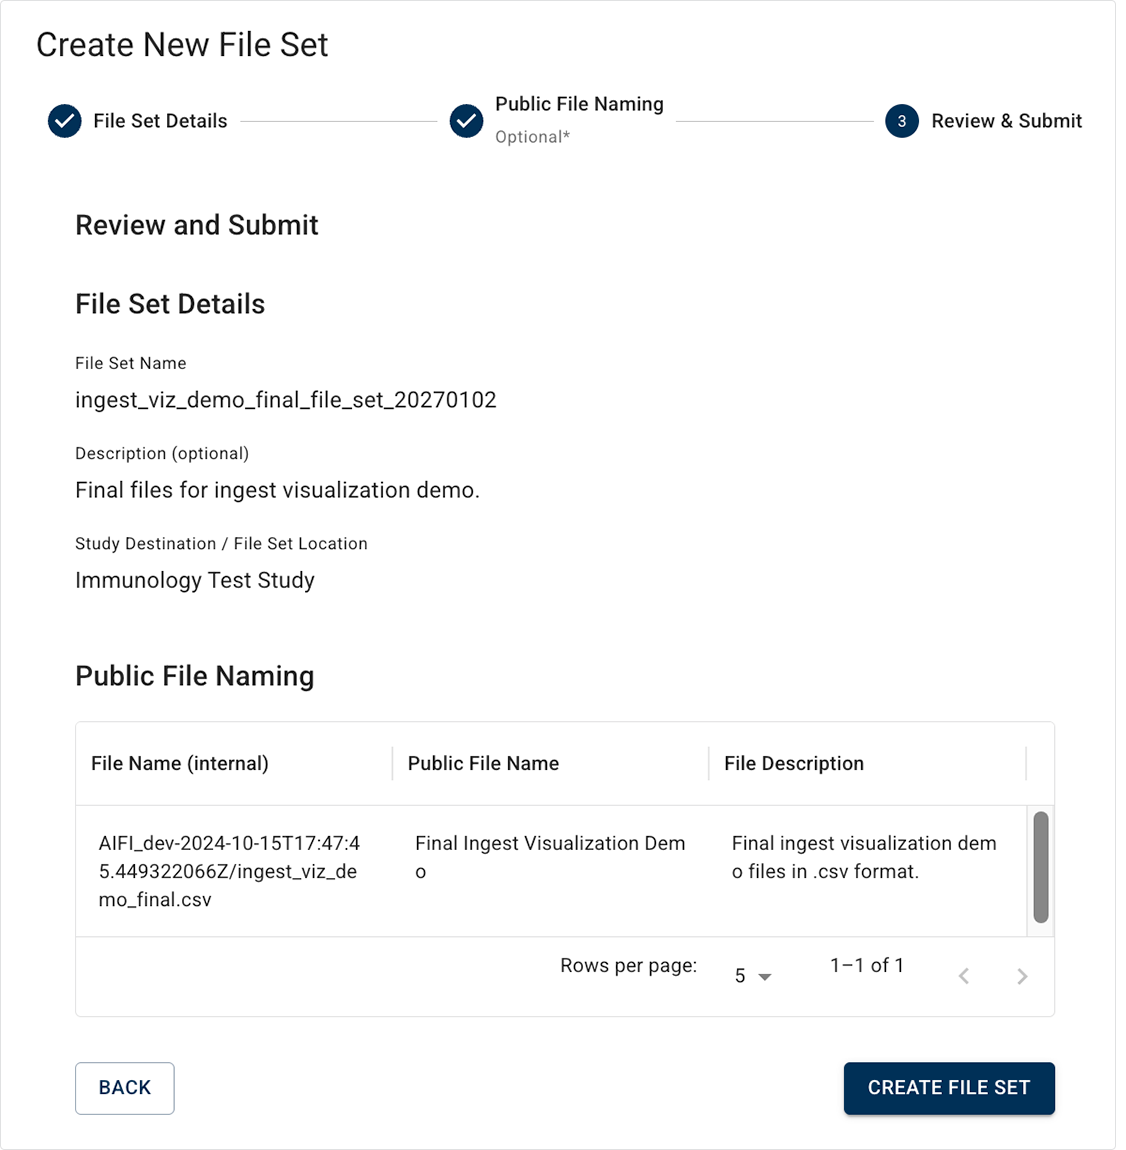
iv. Click CREATE FILE SET, and review the success message that appears. The new file set is now attached to your study.

B. Click ADD TO FILE SET.

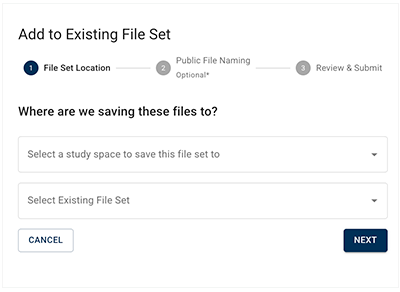
i. On the Add to Existing File Set page, in the Where are we saving these files to? dialog box, enter the requested information and click NEXT.
ii. On the Add to Existing File Set page, in the Public File Naming dialog box, enter the requested information and click NEXT.
iii. On the Add to Existing File Set page,in the Review and Submit dialog box, review the information and click ADD TO FILE SET.
iv. Review the success message that appears. The files have now been added to the file set that's attached to your study.

 Related Resources