
Create and Use Certificates of Reproducibility (Tutorial)
| Abbreviations Key |
AIFI | |
CertPro | Certificate of Reproducibility |
GCP | Google Cloud Platform |
GUID | globally unique identifier |
HISE |
At a Glance
A Certificate of Reproducibility (CertPro) is a detailed, step-by-step record of scientific research, including data, algorithms, computational environment, tools stack, and results. To enable accurate reproducibility of results, the trace is generated in real time.
This document focuses on creating, modifying, and navigating a CertPro. It also shows you how to set up a workspace in which to re-execute a CertPro, or portions of one. For a conceptual explanation of certificates, see Understand Certificates of Reproducibility.
To request a Data App, contact immunology-support@alleninstitute.org. For details, see Manage Workspaces (Tutorial).
Instructions
To create or work with your CertPro, navigate to HISE. Then follow the instructions in the applicable section below.
Create a certificate
1. Navigate to COLLABORATION SPACE > Data Apps, and click on the Data App you want to work with.
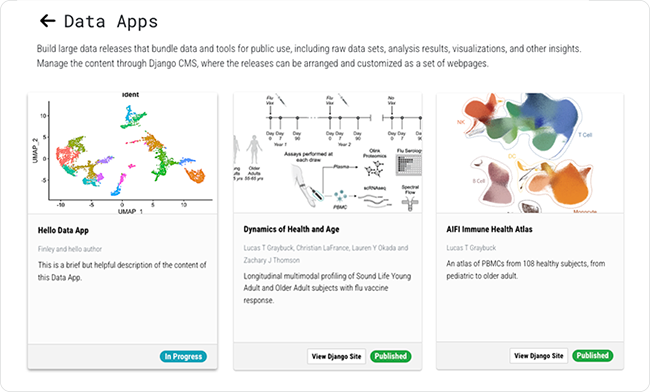
A certificate can't be created until you add assets from a study. To learn how to add a study and study assets to your Data App, see Manage Assets in Data Apps (Tutorial). |
2. In the left side navigation panel of the Update page, in the Data App Details column, click CERTIFICATE OF REPRODUCIBILITY.

3. View the newly created certificate (see the example at the end of this document, and see View a certificate below).
Add an asset to a certificate
Follow the preceding instructions in this document to create a CertPro, and add one or more studies and content assets to your Data App. For details, see Manage Assets in Data Apps (Tutorial). Then follow the instructions in this section to add a visualization, file set, or notebook to your certificate.
1. Add a visualization
A. In the left side navigation panel of the Update page, in the Data App Details column, find the study that contains the visualization you want to add, and click VISUALIZATIONS.

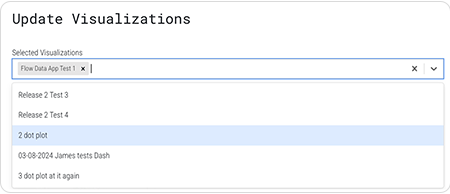
B. On the Update Visualizations screen, click the arrow to the right of the Selected Visualizations field, and choose a visualization associated with the study.
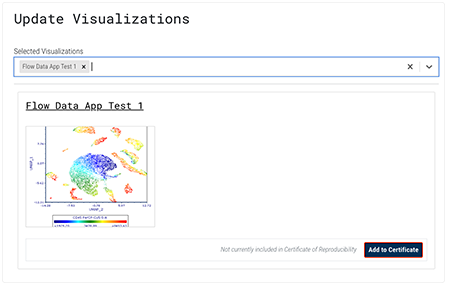
C. In the lower-right corner, click Add to Certificate.
D. In the confirmation dialog box, click ADD TO CERTIFICATE.

E. Read the text of the Do you want to add this asset to your certificate? dialog box. If you agree, click the checkbox next to Do you want to initiate this certificate as executable? Then click ADD TO CERTIFICATE.

F. A status notification appears to confirm that the asset has been added.

2. Add a file set
A. In the left side navigation panel of the Update page, in the Data App Details column, find the study that contains the file set you want to add, and click FILE SETS.

B. On the Update File Sets screen, click the arrow to the right of the Selected File Sets field, and choose one or more file sets associated with the study.

C. For each file set you want to add to the certificate, click Add to Certificate.

D. Follow the same confirmation process explained in Step 1D–F.
3. Add a notebook
A. Click NOTEBOOKS.

B. On the Update Notebooks and associated items screen:
i. Click the arrow to the right of the Selected from Saved IDEs field, and choose a notebook associated with the study. If no options appear, see Step 3.B.ii.
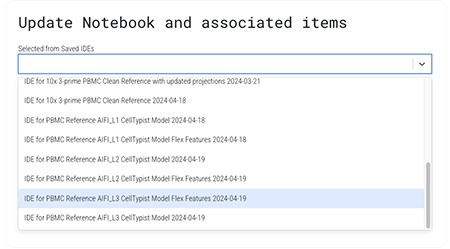
ii. In the GitHub Links field, paste the link to a notebook in your repository, and then click Save.
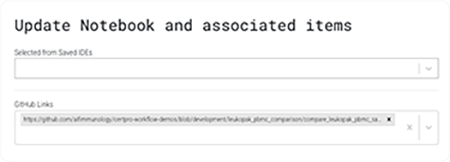
C. Click Add to Certificate.
D. Follow the same confirmation process explained in Step 1D–F.
Add a description
1. Follow the preceding instructions to create your certificate.
2. On the Certificate of Reproducibility page, to the right of the Description field, click the blue pencil icon.

3. In the Edit Certificate Description dialog box, enter a brief description of the work represented by the data trace, and click Submit.

4. View the new description in the Description field.

View a certificate
1. Navigate to COLLABORATION SPACE > Data Apps.
2. Click the card for the Data App you want to view.
3. In the left side navigation panel of the Update page, in the Data App Details column, click Certificate of Reproducibility.

4. On the Manage Certificate of Reproducibility page, click View Certificate of Reproducibility.

The vertices are color coded to represent the type of data they contain, as shown in the accompanying color key and partial sample certificate. A CertPro illustrates the process of beginning with raw data, applying a standardized processing pipeline, and then performing custom analyses to generate a shareable result.

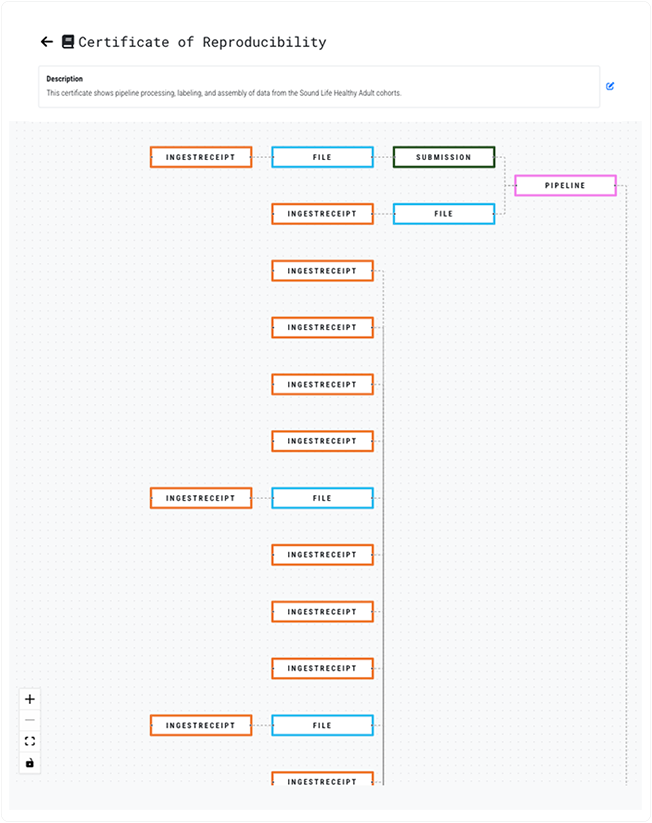
Zoom in, zoom out, or fit on screen
1. Navigate to your certificate, and make sure it's editable. For details, see Understand Certificates of Reproducibility.
2. In the lower-left corner of your screen, find the zoom in (+), zoom out (-), fit view, and toggle interactivity icons.

3. To zoom in on a particular vertex, click the zoom in (+) icon repeatedly until the vertex you want to see is large enough. Alternatively, click Cmd + plus (+) to enlarge the content of your screen.
4. To zoom out, click the zoom out (-) icon repeatedly until the portion of the certificate you want to view is visible. Alternatively, click Cmd + minus (-) to reduce the size of your screen content.
5. To move to a different part of the certificate, click and drag the hand tool as necessary.
6. To recenter your view and fit the entire certificate on the screen, click the fit view icon, which resembles an open square.
Copy the GUID
1. Navigate to the Data App that bears the certificate whose GUID you want to copy.
2. In the left side navigation panel of the Update page, in the Data App Details column, click CERTIFICATE OF REPRODUCIBILITY.

3. On the Certificate of Reproducibility page, in the upper-right corner, click Copy GUID. A brief Copied! Alert flashes near your mouse pointer.

4. Paste the GUID as needed. For example, the following GUID identifies the CertPro associated with the AIFI Human Immune Health Atlas:

 Related Resources
Understand Certificates of Reproducibility
