
Get Started with Pixi/Conda Environment Stacking (Tutorial)
Last updated 2026-07-06At a Glance
Environment packages can accumulate as older iterations pile up and dependency versions change over time, making the collection of environments difficult to navigate. To manage the clutter, teams sometimes archive older environments, breaking any IDEs that still use them.
To keep things better organized, Pixi/Conda stacking arranges successive environments into neat layers, grouping iterative versions into tidy stacks, where they remain available for shared access. Only the layer marked Top of Stack is active. The other layers in each stack are preserved for reference and can be promoted to the top at any time. Stacks keep the relationships among environments logical and visible, letting you reorganize layers as your dependencies evolve.
NOTE
When you change a layer, you change it for everyone who uses the environments in that stack, helping you and your team organize your shared environments.
When to Use This Feature
Use this feature to group related Conda or Pixi environments (for example, you could create stacks representing different modalities, dependency configurations, or stages of an analysis pipeline):
Keep older environments available without cluttering the shared list or breaking existing IDEs.
Group newer Pixi environments with their older Conda equivalents so you can keep related environments together and compare them, troubleshoot changes, or revert.
Search and sort layers by name, date, or status so you can quickly surface the right environment in a stack instead of hunting through scattered environments.
Rearrange stacks as your research evolves by adding, moving, or removing layers, or promoting a new layer to the top of the stack. The underlying environments are preserved.
Description
In the new Environment Packages hub, each collapsed stack displays the number of layers it contains. The collapsed stack below, for example, has six (6) layers.

In a live stack, you can click the arrow to expand the stack and display layer details. The image below shows a single layer—the top layer—from the expanded pixi-sample-v3 stack. Clicking the ellipsis (...) displays actions like Move to a Different Stack and Remove from Stack. To support reproducibility, the underlying environments in each stack remain intact even if you remove a layer or dissolve the entire stack.

Each expanded layer includes the following details:
Name | Environment name |
|---|---|
Last modified | Email of the person who made the last change and the date/time of the change |
Status | Environment state, such as |
Package manager tag | Label showing which package manager the environment uses, such as |
Other tags | Label showing any tags applied when the environment was created, such as |
Top layer tag |
|
For details on the HISE environment workflow, see the links at the bottom of this page. If you have questions or need help, contact Support.
NOTE
Environments with identical names, excluding the suffix, are grouped automatically. For example, piximinimal-v2 and piximinimal-v3 would be stacked automatically. To create your own stack, you must choose two or more environments. When you stack environments manually, the names don't have to be identical. For example, you might group conda-sample-v3 with pixi-sample-v3.
Stacks of preset modalities such as archr, piximinimal, and Olink, are maintained by the HISE team and can't be renamed, shuffled, or otherwise changed.
Instructions
Expand or collapse an existing stack
In the Environments section, find the stack you’re interested in.
A. Click the arrow at left to expand the stack.
B. In the expanded stack, the layers appear as a vertical list. The active environment is marked with aTop of Stackbadge.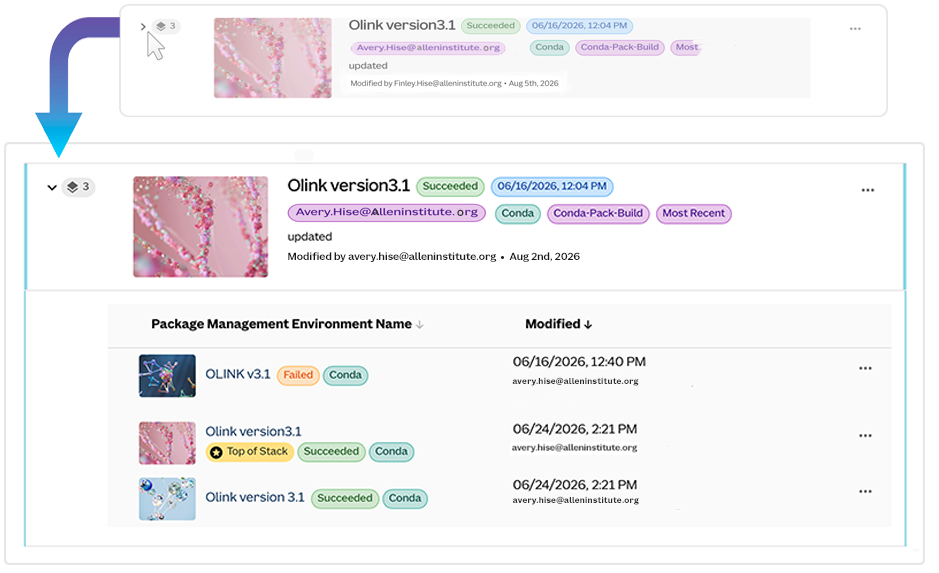
Create a new stack
Environments are grouped for you automatically by title (see the NOTE above this Instructions section), but you can also create groups of your own. To group an IDE environment manually with at least one other environment, follow these steps:
From the top navigation in HISE, select Research > Environment Packages.
Find the environment you want to use as the first layer in a stack, and click the ellipsis (...) to the right of the environment.
Select Create Stack with this Env Pack.

You must choose two or more environments to create a stack. On the Create New Stack page, in the Populate Stack section, define your stack:
A. To choose two or more layers to include in your stack, select the checkboxes.
B. To select all available layers, select the checkbox at the top of the stack:
i. A dialog box near the pagination controls indicates the number of layers selected.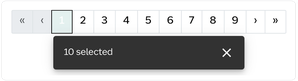
ii. To browse available environments, use the pagination controls at the bottom of the page.To confirm your selections, click Next.

On the Select Top of Stack page, click the radio button next to the environment you want to appear at the top of your stack.
Click Create Stack. You are returned to the Environments page, and the new stack appears on-screen at the top of the Environment Packages list.
Sort or get details
Sort the environments in a stack:
A. To sort environment names in ascending or descending alphabetical order within a stack, click the arrow next to Package Management Environment Name.
B. To sort environments in ascending or descending order by date and time, click the arrow next to Modified.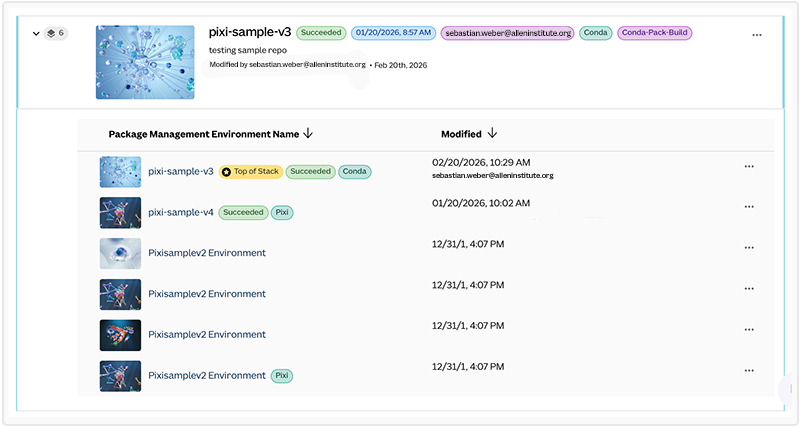
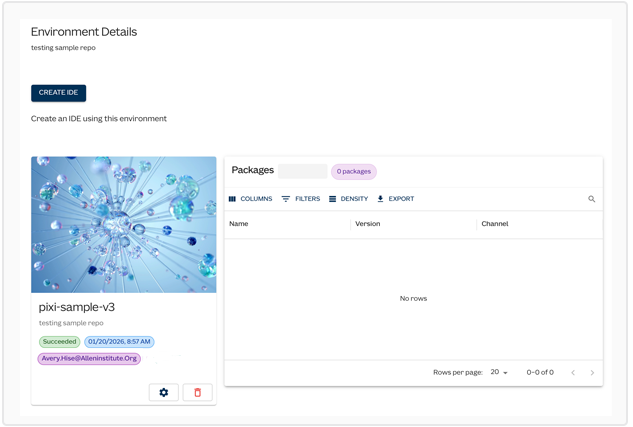
To drill down on a particular layer, click its name to open the Environment Details page. To create an IDE with that layer, click CREATE IDE.
Add a layer to an existing stack
NOTE: The Add to Stack option is available only for standalone environments, not for environments that are part of an existing stack.
Use the following steps to add an environment to an existing stack:
On the Environment Packages page, use the search box to find the environment you want to add to a stack.
Click Add to Stack.

On the Add to Stack page, click the radio button next to the stack you want to add the environment to.
To confirm your selection, click ADD TO STACK. The new environment appears in the stack immediately as a new layer.
Set a layer on top of the stack
On the Environment Packages page, find the stack you want to work with, and expand the stack.
In the Package Management Environment Name column, find the layer you want to promote, and click the ellipsis (...) to the right of the layer.
Click Set as Top of Stack. No confirmation is necessary. The stack collapses automatically, and the specified environment moves to the top.
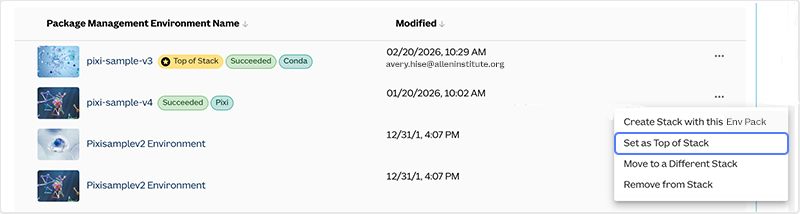
On the Environment Packages page. Click the icon to expand the stack. The Top of Stack badge now appears next to the layer you selected, and that environment has become the stack title.
Move to a different stack
Follow these steps to move an environment created under one stack into a different stack:
On the Environment Packages page, find the stack you want to work with, and expand the stack.
Locate the layer you want to move, click the ellipsis (...), and choose Move to a Different Stack.
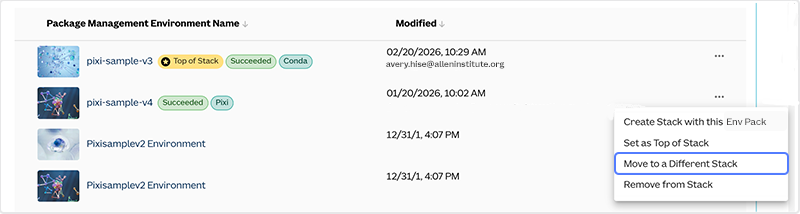
On the Move to Different Stack page, click the radio button next to the destination stack, and click ADD TO STACK. The layer is appended to the destination stack unchanged and appears there as a new layer. The layer is removed from the original stack, but the environments remain intact.
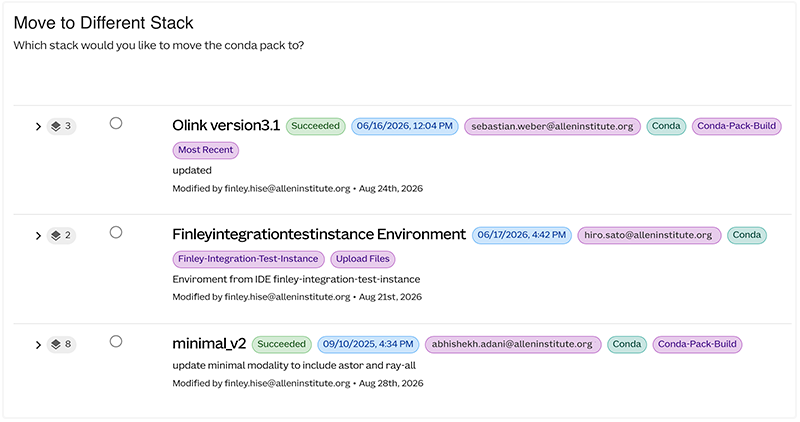
Remove from stack
When you remove an environment from a stack, the environment itself is preserved. Only its association with the stack is removed. Follow these steps to remove an environment:
On the Environment Packages page, find and expand the stack that contains the environment you want to remove.
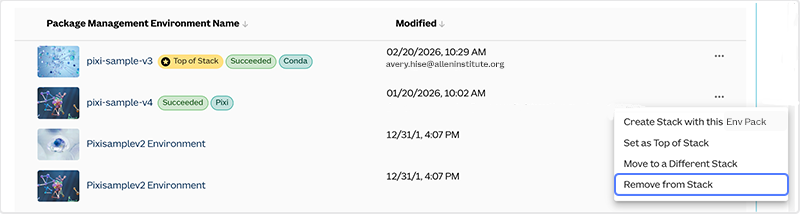
Click the ellipsis (...) next to the layer you want to remove, and choose Remove from Stack. No confirmation is required. If you remove the environment labeled Top of Stack, that label moves to the environment that's first in the list of remaining environments. You're returned to the Environment Packages page, and your new, smaller stack appears at the top of the list of stacks.
Dissolve a stack
Follow these steps when you no longer want to link a group of environments as a stack, but you want to keep the environments themselves:
On the Environment Packages page, find the stack you want to dissolve, and click the ellipsis (...) to the right of the stack.
From the drop-down menu, select Dissolve Environment Stack.

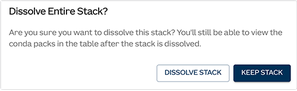
To confirm your selection, in the Dissolve Entire Stack? dialog box, select DISSOLVE STACK. The stack is removed, and each former layer becomes a standalone environment. All environments are preseved.
Related Resources
Convert a Conda IDE to a Pixi Environment (Tutorial)
Save a Custom Conda Environment (Tutorial)