Last modified 2025-12-24 |
|
Use the Upload Files SDK Method (Tutorial)
At a Glance
This document explains how to upload files–for example, cleaned datasets, analysis outputs, summary tables, or visualizations–to a study in the HISE Collaboration Space. Doing so lets you share your insights with others. The upload_files() signature is shown in the box below, and the method parameters follow. If you have questions, contact Support.
Method signature
 upload_files()
hp.upload_files(
    files: list,
    study_space_id: str = None,
    project: str = None,
    title: str = None,
    input_file_ids: list = [],
    input_sample_ids: list = [],
    file_types: list = [],
    store: str = None,
    destination: str = '',
    do_prompt: bool = True,
    do_conda_build_check = True,
    use_fast_mode = False,
)
uploadFiles()
uploadFiles(
  files,
  studySpaceId = NULL,
  project = NULL,
  title = NULL,
  inputFileIds = list(),
  inputSampleIds = list(),
  fileTypes = list(),
  store = NULL,
  destination = NULL,
  doPrompt = TRUE,
  doCondaBuildCheck = TRUE,
  useFastMode = FALSE,
)
Parameters
The parameters for this method are listed in the following table. In each key:value pair, the value must be of type list.
Python Parameters | |||
| Parameter | Data type | Required or optional | Description |
files | list | required | List of file paths to upload. NOTE: Absolute paths only; ../ and ./ not supported. |
study_space_id | str | required | ID of the upload destination (study space or workspace). |
title | str | required | Title or description of your choice. For naming conventions that support autostacking, see Step 1 of Create an IDE Stack (Tutorial). NOTE: Must be unique per call. If you run upload_files() multiple times, change the title each time. |
input_file_ids | list | required | Input file IDs associated with this upload call (to track data provenance). |
project | str | optional | Project name or ID. |
input_sample_ids | list | optional | Input sample IDs associated with this upload. |
file_types | list | optional | List of file types included in the upload. |
store | str | optional | Name of Project Store or other backend storage location. |
destination | str | optional | Destination path or folder NOTE: Use a new folder/path if a prior attempt partially succeeded and you get a “file already there" error. |
do_prompt | bool | optional | Specifies whether to prompt the user for confirmation before uploading. |
do_conda_build_check | bool | optional | Specifies whether to create and build the active Conda environment. Default is true. |
use_fast_mode | bool | optional | Specifies whether to speed up the upload flow by skipping the step that builds the IDE environment. Default is false. |
R Parameters | ||
| Parameter | Required or optional | Description |
files | required | List of local files to upload. |
studySpaceId | required | UUID of the study space to which these files should belong. |
title | required | Title of the track record. |
inputFileIds | required | UUIDs of files that provide data for these files. |
project | optional | Project for the files. Required if study space ID is not provided. |
inputSampleIds | optional | Other samples that provide data for these files. |
fileTypes | optional | File types for the uploaded files. Default is the file extension. |
store | optional | Which store to upload to: either project or permanent. Default is project. |
destination | optional | Destination folder into which the file is uploaded. Ignored if using the permanent store. |
doPrompt | optional | Specifies whether to prompt for user input. Default is TRUE. |
doCondaBuildCheck | optional | Specifies whether to create and build the active Conda environment. Default is TRUE. |
useFastMode | optional | Boolean that specifies whether to speed up the upload flow by skipping the step that builds the IDE environment. Default is FALSE. |
 Get Help
If you get stuck during an upload_files() call, refer to the steps of this tutorial (examples are in Python unless otherwise specified). To use the baked-in help in your IDE, try one of the following commands. Still not working? To file a ticket, click Collaboration Space. Doing so lets you share your insights with others. The upload_files() signature is shown in the box below, and the method parameters follow. If you have questions, contact Support.
| Python | R | Output |
help(hp.upload_files) | help(uploadFiles) | Function signature, list of parameters, class, and a brief description of the method in a compact plain-text format |
hp.upload_files? | ?uploadFiles | Method signature, docstring (description), file location, and file type in more readable format |
hp.upload_files?? | hise::uploadFiles | Signature, docstring, file path, a verbose set of metadata, and the source code for the method |
Instructions
 Import libraries
To get started, set up your environment to interact with HISE programmatically and access all available SDK functions. For details, see Use Hise SDK Methods.
1. Navigate to HISE, and use your organizational email address to sign in.
2. Open an IDE. For instructions, see Create Your First HISE IDE (Tutorial).
3. To import hisepy, enter the following code into a new cell in your IDE.
# Import the Python SDK to enable programmatic access to HISE functionsimport hisepy as hp
 Get the study space ID
Each study in any given project is assigned a study space ID. This unique ID ensures that your uploaded files are saved to the correct study in the Collaboration Space. The study space ID (recommended) or project name is one of the four parameters required in an upload_files() call. For details, see the Tips & Trick section on this page. Refer to the accompanying table for a full list of required and optional parameters.
1. To find your study space ID, enter the following code. A list of dictionaries is returned.
# Return all available study spaces for your account

ss_output = hp.get_study_spaces()
2. To search for the study you want, enter the following line. In this example, we look up a study titled "Sample Study."
# Find the name of a particular study space

ss_name = 'Sample Study'
for study_space in ss_output:
if study_space['name'] == ss_name:
ss_obj = study_space
# Show the matching study space dictionary

ss_obj
3. To extract the ID from the dictionary object, enter the following code.
# Extract the unique study space ID from the selected study space object

ss_id = ss_obj['id']

print(study_space)
 Retrieve file IDs and download files to your IDE
To ensure that you work with the intended datasets, first identify their IDs (from an advanced search, for example), and then download them using a reader method like read_files(), read_samples(), or cache_files(). Downloading the files creates a local copy of the data and allows the system to track which files have been accessed in your current session.
1. Identify your file ID(s). You can list as many as you need, separated by commas (for example, ['ID1', 'ID2', 'ID3']).
# Pass in file ID(s)

files = ['4613f981-127e-4b07-a437-6f2d814eac9d']
2. Download files to your local environment (the working directory of your IDE). You have several options, depending on your workflow. When in doubt, use cache_files().
A. Use cache_files(). To return absolute path(s) to your downloaded files, with no attached metadata, call cache_files().
# Cache the specified files

hp.cache_files(files)
B. Use read_files(). To return file content with its associated metadata, call read_files(). For details, see Use the Read Files SDK Method.
# Read the specified files and retrieve metadata

hp.read_files(file_list=files)
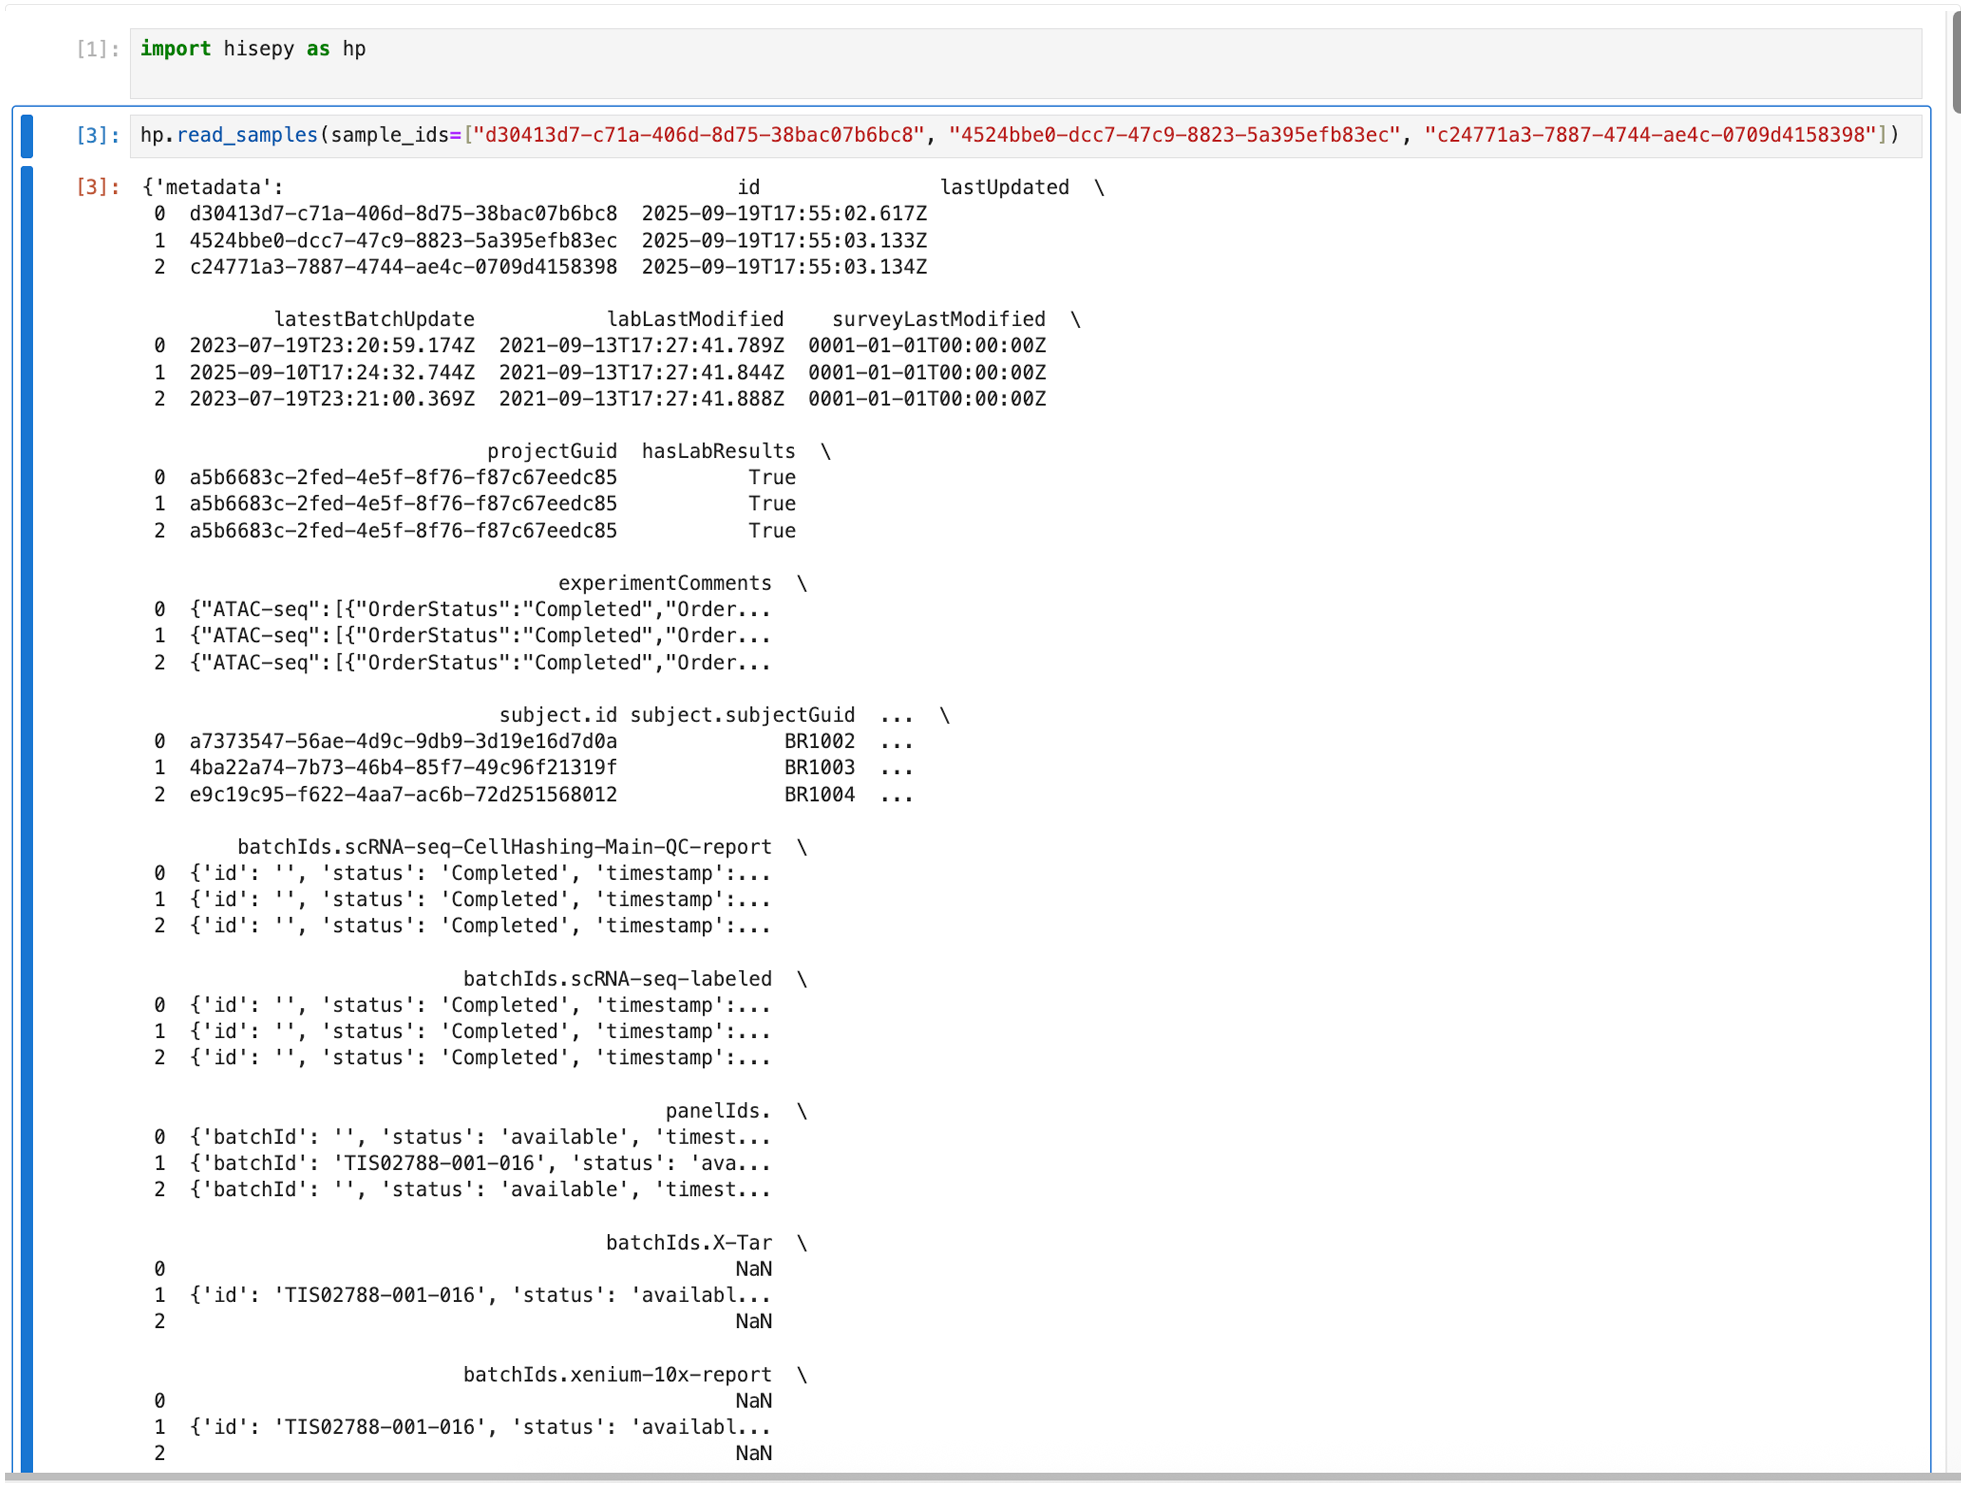
C. Use read_samples(). To return structured sample data, such as rows from a CSV file, call read_samples(). For details, see Use the Read Samples SDK Method (Tutorial).
# Read sample data from files

hp.read_samples(sample_ids=files)
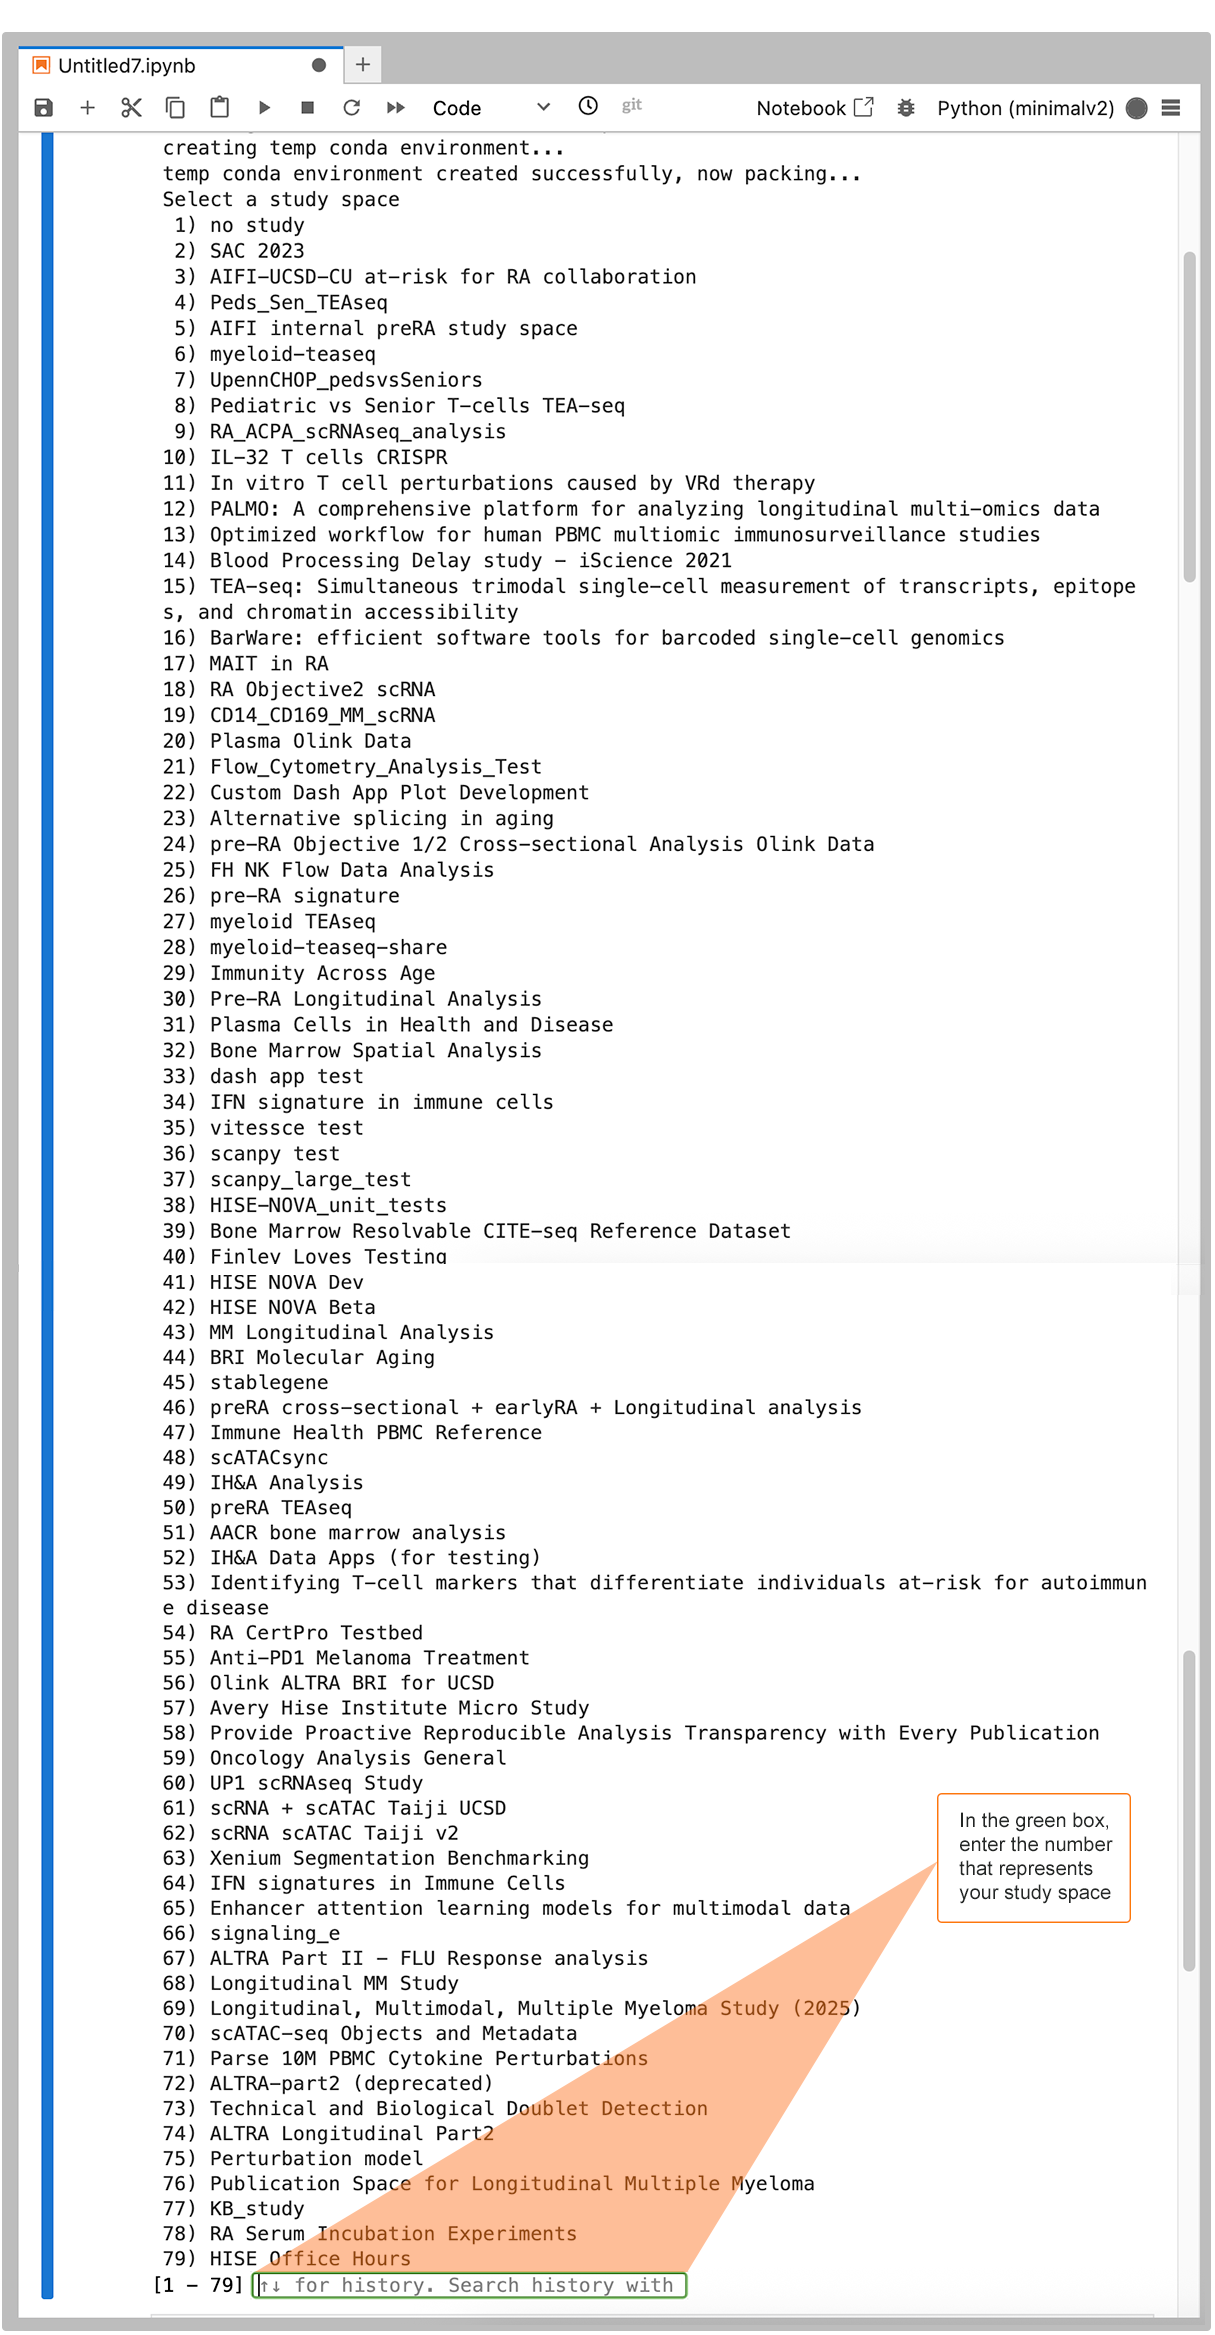
3. When prompted to select your study space, find it in the list and enter the corresponding number into the field at the bottom, as shown in the following image.
4. If you provided a sample ID or an empty list as an input, supply sample IDs for each uploaded file.
"Please provide input of comma separated sample ids for the files being uploaded: " |
This prompt ensures that you provide the sample metadata necessary for reproducibility and advanced search functionality. Enter the sample IDs as a comma-separated list, as in the following image, or enter "" to upload without a sample association.
 Upload files to your study
To make your data accessible for analysis or sharing, upload your results to the study space.
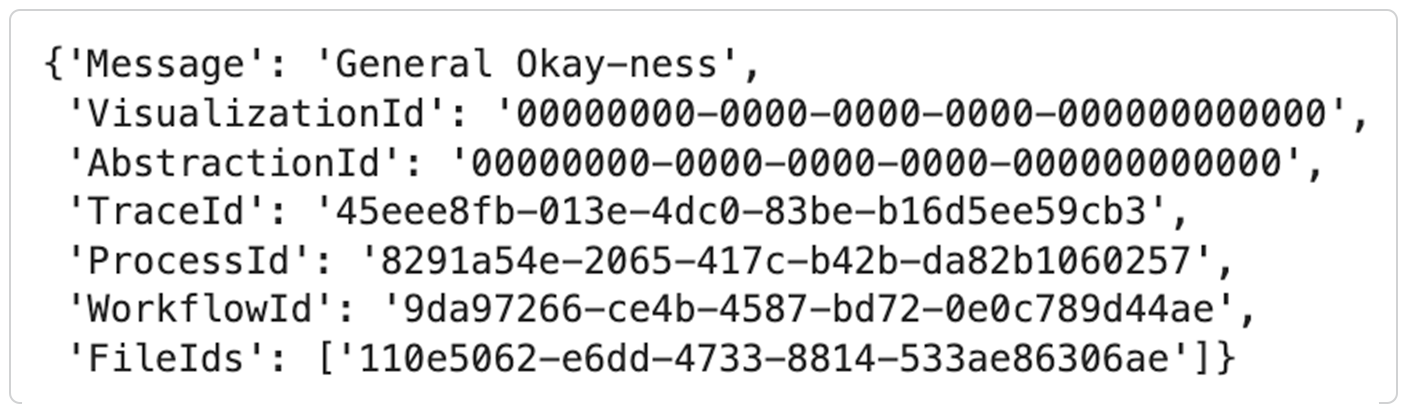
1. To upload your results file(s), replace the file path and input file IDs as necessary. A successful upload will print out a trace id.
# Upload results file(s) to specified study space

hp.upload_files(

    files=['input/2842984779/cohorts/4613f981-127e-4b07-a437-6f2d814eac9d/hise-example.txt'],

    study_space_id=ss_id,

    title='A demo upload',

    input_file_ids=files

)
 Track the status of your file uploads
1. To track the status of an upload files call, check the IDE for an error message or success notification, as shown in the accompanying image.
2. For detailed information, return to HISE:
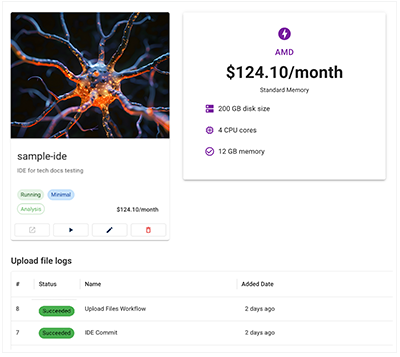
A. Under RESEARCH, click the card for your IDE. A tag indicates whether the call has succeeded, failed, or is still in progress, and the Upload file logs show the status of all recent calls.
B. If you used Fast Mode to upload files to an IDE, a small blue tag appears next to the IDE in the list. For details, see Use Fast Mode (Tutorial).

C. For granular information about your file uploads, check the IDE Instances page in the COLLABORATION SPACE. It displays an upload files workflow banner, list view, and detail view. For details, see Work with Studies (Tutorial).
Tips and Troubleshooting
 Use batch uploads to avoid timeouts
Timeout errors usually occur when you try to upload a large number of files or a large total data volume in a single operation. The system is unable to process the data within the allotted time, resulting in a timeout. Divide your upload into smaller batches, with fewer files per call. Instead of consolidating all research activities into a single IDE, create separate notebooks for specific purposes, such as preprocessing, predictive modeling, and visualization. For information on space limitations, see the FAQs document.
Set the files and input_file_ids parameters as lists
The files and input_file_ids parameters must be set as lists even if you upload only one file. The files list should contain absolute file paths–not just filenames or relative paths. To obtain these paths, use cache_files(), which downloads the specified files and stores them locally in the cache directory, returning their locations. The input_file_ids list includes the IDs of all files used to generate the result files. This ensures traceability and reproducibility, clarifying which input files yielded the uploaded results.
Supply either study_space_id or project
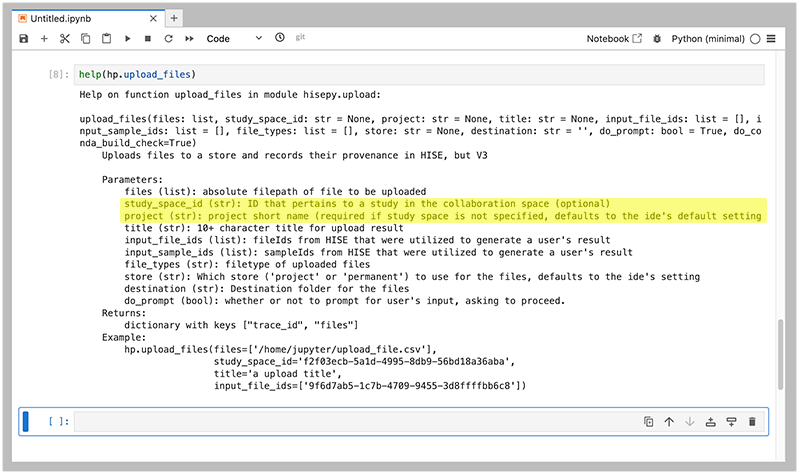
The upload_files method lets you specify certain parameters in alternative ways. To indicate where files should be uploaded, for example, you can provide either a study_space_id or a project (highlighted)–but not both. If you're not sure which parameter is required or how to format it, use help(hp.upload_files) to review the SDK help documentation, as shown in the following image. In addition, check the HISE documentation shown in the Related Resources section at the bottom of this page.
Use Conda, not pip, for package installation
Conda creates a snapshot of the tools and resources necessary to re-create scientific or data analytic results. It captures not only the results themselves, but also the environment in which the steps were taken or computations made. In addition, using pip instead of Conda for installlation causes conflicts in the upload_files() process. The uploaded item will not be attached to your study in the HISE Collaboration Space.

| Note: For the HISE SDK, install with pip. To preserve reproducibility and avoid errors, use Conda to install all other scientific packages and dependencies. |
 Related Resources
Attach an IDE to a Study (Tutorial)
Use HISE SDK Methods and Get Help