| Last modified 2024-09-13 |
Install the Google Cloud CLI (Tutorial)
 | Abbreviations Key |
| CLI | command line interface |
| SDK | software development kit |
At a Glance
To install the Google Cloud CLI, visit the Google installation page to download the SDK files, and then follow the instructions in this document.
Instructions
The following instructions are for a Mac installation and assume little or no experience with the Google Cloud CLI. A link to the Windows download is included, but the steps required for a Window installation might be different.
1. To install the Google Cloud CLI, open a terminal window and navigate to your root directory. For Allenites, this is usually your lastname.firstname
2. Choose the right download for your system:
3. If you're not sure which system you have, enter the following command in your terminal:
uname -m
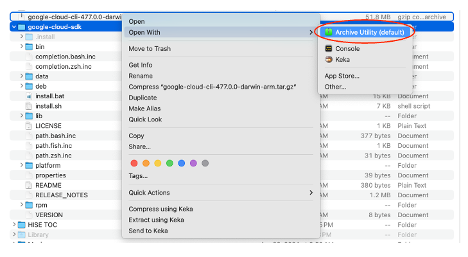
4. To extract the files, open a Finder window, locate the folder, right-click it, and choose Open With > Archive Utility.

5. To move to the folder level in your terminal, enter the following command:
cd google-cloud-sdk
6. To run the installation script, enter the following command:
./install.sh
The result looks something like this:

7. Answer the questions that follow:
Do you want to help improve the Google Cloud CLI (y/N)?
To avoid collection of anonymized usage data, enter N.

Modify profile to update your $PATH and enable shell command completion?
To add the Google Cloud CLI to your path, answer Y. This choice also enables you to use the Tab key to autocomplete shell commands.

8. To save your installation, quit and reopen your terminal.

9. To get the preferred version of Python, enter Y.

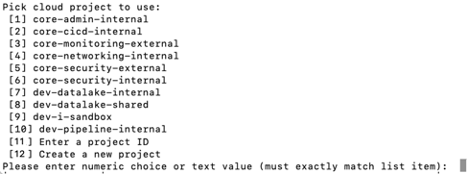
10. When you reach the following line, choose the number at left that corresponds to your Allen Institute partner organization and project.

11. Choose a default Google Compute Engine zone if your organization has one, or press Enter to keep the default.

 Related Resources