Use the Conda Environment (Tutorial)
At a Glance
 | Abbreviations Key |
| bwa | Burrows-Wheeler Aligner |
-c | channel |
| HISE | Human Immune System Explorer |
| IDE | integrated development environment |
-n | name |
| PyPi | Python Package Index |
| scRNA-seq | single-cell RNA sequencing |
-y | yes |
Conda is an open-source tool that makes it easy to create, save, load, and switch between environments on your virtual machine. Each HISE IDE comes with a set of preinstalled Conda-based tools and scientific libraries. The specific Conda package depends on the modality you choose. Each modality is defined by key scientists based on specified project needs, such as scRNA-seq or flow cytometry (for details, see Manage NextGen IDE Packages). Sometimes, however, you might need to install specialized packages. To maintain reproducibility, the modified environment can be captured and shared with other scientists. This document shows you how to create and share a customized Conda environment.
Conda Basics
Use Conda, rather than Pip, to install your desired packages. Pip and Conda both use dependency management systems, but Conda is our default package management tool. Using Pip could overwrite your Conda-installed packages. Pip also installs PyPi packages, which might not be fully compatible with Conda dependencies.
The following table summarizes common Conda commands, including some of those discussed in this document:
| Conda Command | Example or note | Description |
|---|---|---|
conda info | conda info --envs | Verify installation or version |
conda install <packagename> | conda install -c conda-forge r-seurat=4.3.0 | Install a package |
conda update conda |
| Update Conda to the latest version |
conda update <packagename> | conda update -c bioconda bwa | Update a package |
conda config | conda config --add channels bioconda | Modify configuration values in .condarc |
conda list | conda list -n bioenv | List installed packages in the specified environment |
conda create | conda create -n bioinfo -c bioconda bwa | Create a new conda environment from a list of specified packages |
conda activate | conda activate /home/workspace/environment/my_conda_env | Activate the specified Conda environment |
conda search |
| Search for packages and show related information |
conda remove --all | conda remove -n myenv --all | Remove all packages and the Conda environment itself |
conda env list | An asterisk appears next to the currently active environment | Lists all Conda environments. Same as conda info --envs |
Instructions
 Open a HISE IDE
1. Navigate to HISE, and use your organizational email address to sign in.
2. From the top navigation menu, click RESEARCH, and choose IDE NextGen from the drop-down menu.
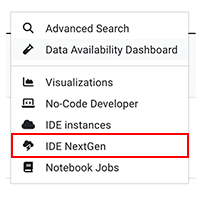
3. On the IDE NextGen page, click Create instance.

4. To open the IDE after it builds, click the arrow in the lower-left corner of the card.

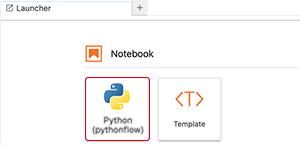
 Open a Jupyter Notebook
1. To open a notebook, select the Python or other icon.
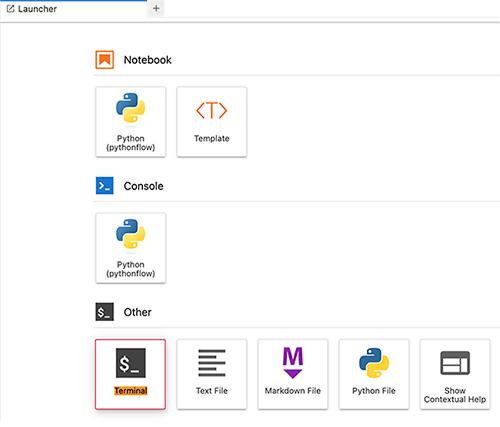
 Search for new packages
You can usually pull packages directly from the Conda default channel. Sometimes you need to search community repositories like conda-forge.
1. To search for packages, click the + sign, and then click the Terminal icon.

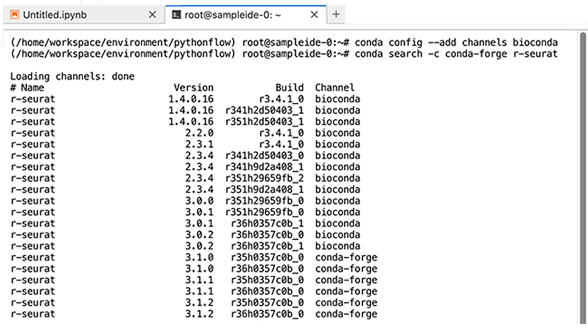
2. To search for bioinformatics packages, use the following command to search the bioconda channel.
conda config --add channels bioconda
3. Use the conda search command, followed by the arguments of your choice, as in the following example.
conda search -c conda-forge r-seurat
 Install the new packages
![]() Install with Conda (preferred)
Install with Conda (preferred)
1. To install the new packages, use conda install followed by the necessary arguments, as in the following example.
conda install -c conda-forge r-seurat=4.3.0
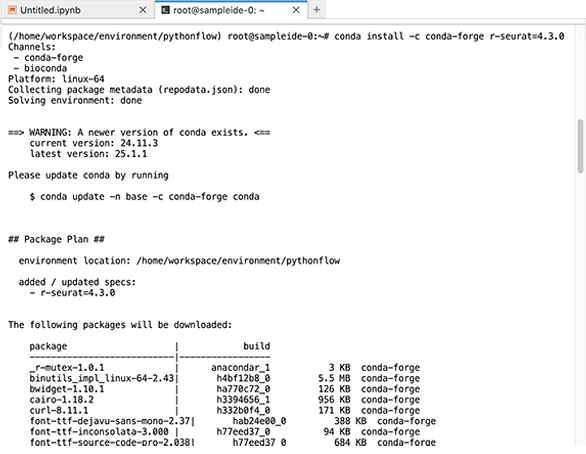
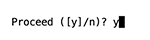
2. At the prompt, enter y to proceed.
After the package is executed, you should see a verification message like this one:
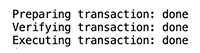
3. (Optional) If you're asked to update Conda, as in the above screenshot, do so now.
conda update -n base -c conda-forge conda
![]() Install with Pip (for packages not available through Conda or housed in GitHub)
Install with Pip (for packages not available through Conda or housed in GitHub)
1. Use the `pip install` command to install the package with Pip, as in the following example:
pip install scanpy
2. A warning a message prompts you to confirm that you want to use Pip. To continue, click y.

3. To ensure that Pip doesn't overwrite Conda-installed packages and cause conflicts in your environment, run the following command for Python or R.
Python
hp.conda_env_builds()
R
condaEnvBuilds()
 Activate the new environment
1. Activate your environment by specifying either the name or the path, as in the following example:
conda activate /home/workspace/environment/my_conda_environment
You can (and should) switch environments when necessary—if there are package conflicts or your use case changes, for example, or if you simply want to refocus your efforts. |
 Export and re-create your environment
You can use a command-line operation to export your Conda environment as a YAML file. This file contains all the original channels, packages, versions, and tags, as well as all associated dependencies. You can use this file to re-create your environment elsewhere or to back up your preferred setup.
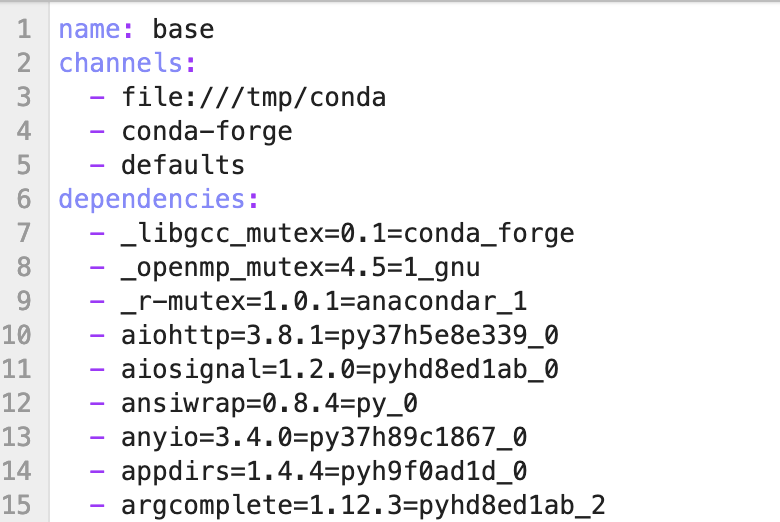
1. To export your environment, enter the following command.
conda env export > /home/workspace/environment/exported_env.yml
2. To make sure the export was successful, open your /environment directory and verify that the file is in it.

3. To re-create the environment using the exported file, enter the following command.
conda env create -f exported_env.yml
Alternatively, specifiy a new environment name when you re-create the environment.
conda env create --name my_new_env -f exported_env.yml
 Related Resources